
Since the loss of direct WEFAX reception from Meteosat, things have never been the same for me with the hobby, although we now have Eumetcast and exceptional images, it takes away that satisfaction of direct reception. Whereas I used to really enjoy the hobby, having it on a plate now with Eumetcast seems to take away the pleasure I once had. Donít get me wrong, Iím grateful for what we have with Eumetcast, and the excellent image quality and resolution seen like never before, but being a ham with a curious mind, I prefer the satisfaction of direct reception. As of lately I seem to have reverted more to APT, but here in Bulgaria, the location is not ideal with much interference from pagers and especially overhead power lines, a far cry from my location in the Central part of UK where I had trouble free reception.
After much thought and searching for alternatives to relayed images, I came up with the idea that maybe HRPT is the way to go. And so it was. In this and future articles, you will follow my adventures in setting up and receiving a HRPT station, not just the good points, but the downfalls also, exactly as it is in this real world.
What is HRPT? Well, HRPT stands for High Resolution Picture Transmission. APT is a derivative or by product of HRPT, whereas APT is 4km resolution (fig 1) HRPT is a whopping 1.1km resolution (fig 2) Itís still received from the same polar orbiting satellites that bring you your APT images e.g. NOAAís 17,18 and 19.
 fig1
fig1
 fig2
fig2
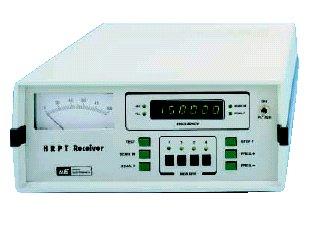
What equipment is needed? We are looking at a dedicated HRPT receiver, a normal APT receiver will NOT work, the HRPT receiver has a wider bandwidth so you must have a dedicated receiver, then you need the decoder, amplifier, Downconverter, Dish and feed, Rotator and controller. It all sounds rather complicated, but taken one step at a time, not so difficult as it seems.
The main choice of receivers I liked were available from Nuova Elettronica, Quorum, and Dartcom, there are other suppliers of HRPT Receivers also but these I favoured because I had a bad deal with after sales on one leading brand who only seemed interested in selling me a new system instead of supporting me with my existing system, and who still makes false claims on their website that no other commercial HRPT receiver is available. The receiver I chose was from Nuova Elettronica in Italy and currently sells at 220 Euro on their website at time of writing this article. The model number is LX1495 (fig 3) it was once available in kit form but now at this price it is only available ready built to go. I bought my receiver second-hand from another GEO member up in Bonnie Scotland.
 fig3
fig3
 fig4
fig4
There are several HRPT decoders on the market, but I chose the Rob Alblas design. (fig4) This unit can be built as a separate or included inside the HRPT receiver.
I chose Robís Decoder because it looks like it meets all my requirements and itís simple to build. Yes, I said build, If you want to do this on a shoestring then it involves home construction although such items can be bought ready made, being a radio ham and having a tight budget I decided I would make what I could and save money rather than buying it ready made. It is really not as difficult as you may think, I was a little daunted at first, but step by step, it can be done. Iím not going to go through all the details of this board as itís already available on the internet at the website of Rob Alblas www.alblas.demon.nl
Rob is a member of the Dutch Werkgroep Kunstmanen (the Dutch equivelant of GEO) who support GEO tremendously, and of which Iím truly grateful for their participation. You may have met some of GEOís Dutch members at the GEO conference, which is held annually, normally in Leicester. This decoder was the first item I built towards my step of owning and using a HRPT station. The PCB (printed circuit board) was a gift to me from the retailer in USA (Far Circuits) http://www.farcircuits.net to set me off in my venture. The board normally costs $25 US dollars, you will have to work that out in your own currency. The Xilink chips and Eprom plus postage were generously donated from Rob Alblas.
http://www.alblas.demon.nl/wsat/index.html
The other components were ordered by my friend Tony at JRW Electronics in the UK for me, from Farnell electronics and some items from his own stock. Total cost of purchased components - around £5. I might add it would have cost me much more (maybe around £100 plus) were it not for the generosity of my friends.
Assembling the Rob
Alblas Decoder Board
Before you make the same mistake as I did, stop and think even before you start assembly. I didnít have any assembly instructions and hastily soldered on the IC holders first, later realising that some wire links had to be soldered underneath them! Duh! First lesson learnt! This resulted in me having to put pvc coated link wires under the board to get round this problem. So letís start correctly.
First, make sure all the drilled holes are unblocked in your PCB, failure to do this can easily damage a component by bending the pins or breaking them off, rendering it useless. Once the board has been inspected and you are sure you have all the parts (double check everything also if possible label the parts so there are no errors), then you are ready for soldering. Be sure to ground yourself first by touching earth somewhere or using special earth straps to prevent static build up. I would recommend starting with all the link wires first, then the pins, this will get you used to soldering before you start with the heat sensitive components.
I would like to add that if anyone does not feel confident at soldering the components to the board, I will be happy to do it for them free of charge, but bear in mind at the moment Iím in Bulgaria so this will result in return postage costs. Despite my shaky hands and failing vision, thereís life in the old dinosaur yet :o) However, if you are prepared to wait, I may soon be back in the UK.
Whilst I was assembling the PCB I had an image of the board and components on my computer monitor, so I could see where all the components went, also I had the second ready assembled PCB by my side for comparison. Believe me, it was a great feeling of satisfaction when I had soldered the last component in place. What always seems overwhelming at first can be quite simple. I remember the words of one friend when I was sharing a truck journey with him on my way to Bosnia on an aid mission and we were discussing overcoming adversities. He said ďHow do you eat an elephantĒ I donít know I replied, to which he answered ďOne piece at a timeĒ I canít begin to tell you how many times these words of advice have helped me in my life when overcome with problems.
 fig 5
fig 5
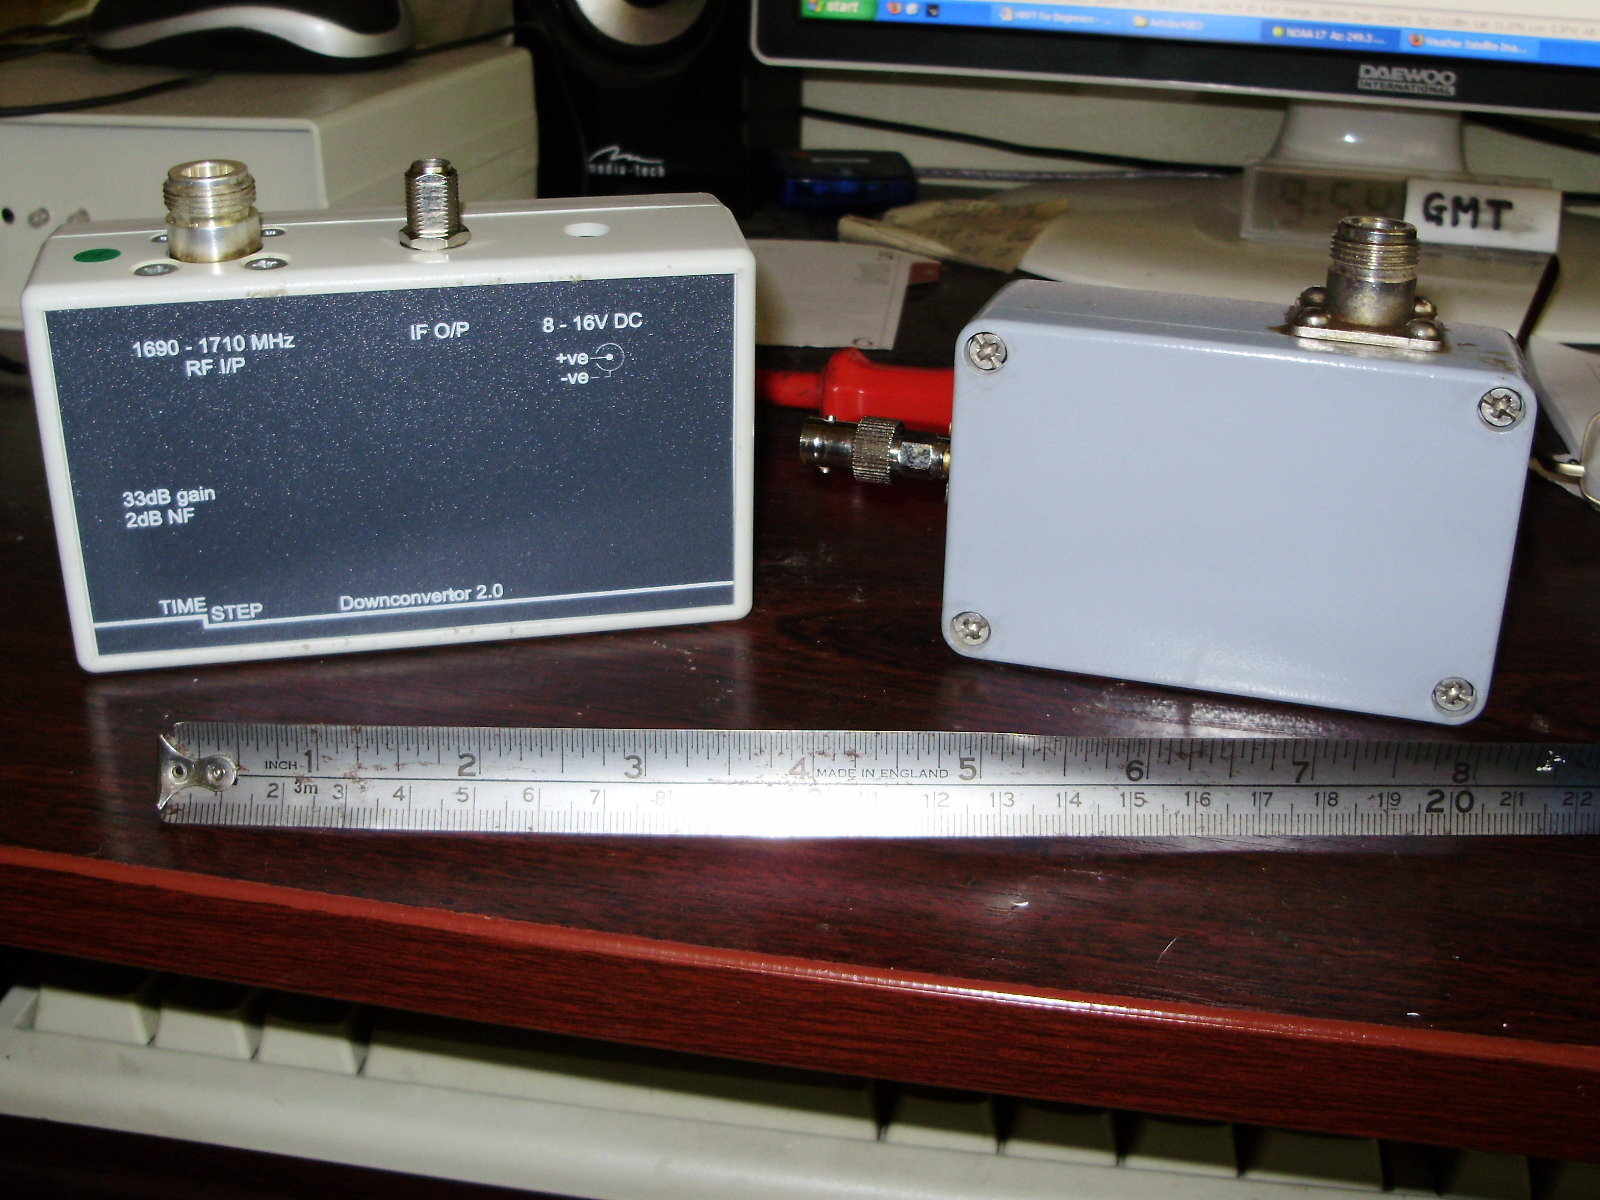
Mine was a commercial ready made Pseudomorphic High Electron Mobility Transistor (or P-Hemt for short) purchased second hand from a fellow GEO member for the bargain price of £25, ) (fig 5&7) I also received one similar amp designed by Sam Elsdon thrown in for free when I purchased the HRPT receiver, very handy if one amp goes down due to lightning strikes, which are quite common here in Bulgaria. The amplifier is placed directly behind the helical feed in the centre of the satellite dish for maximum signal gain. The P-Hemt field effect transistor tends to give higher gain than the normal FETís due to the way itís made, but for the moment letís keep things simple.
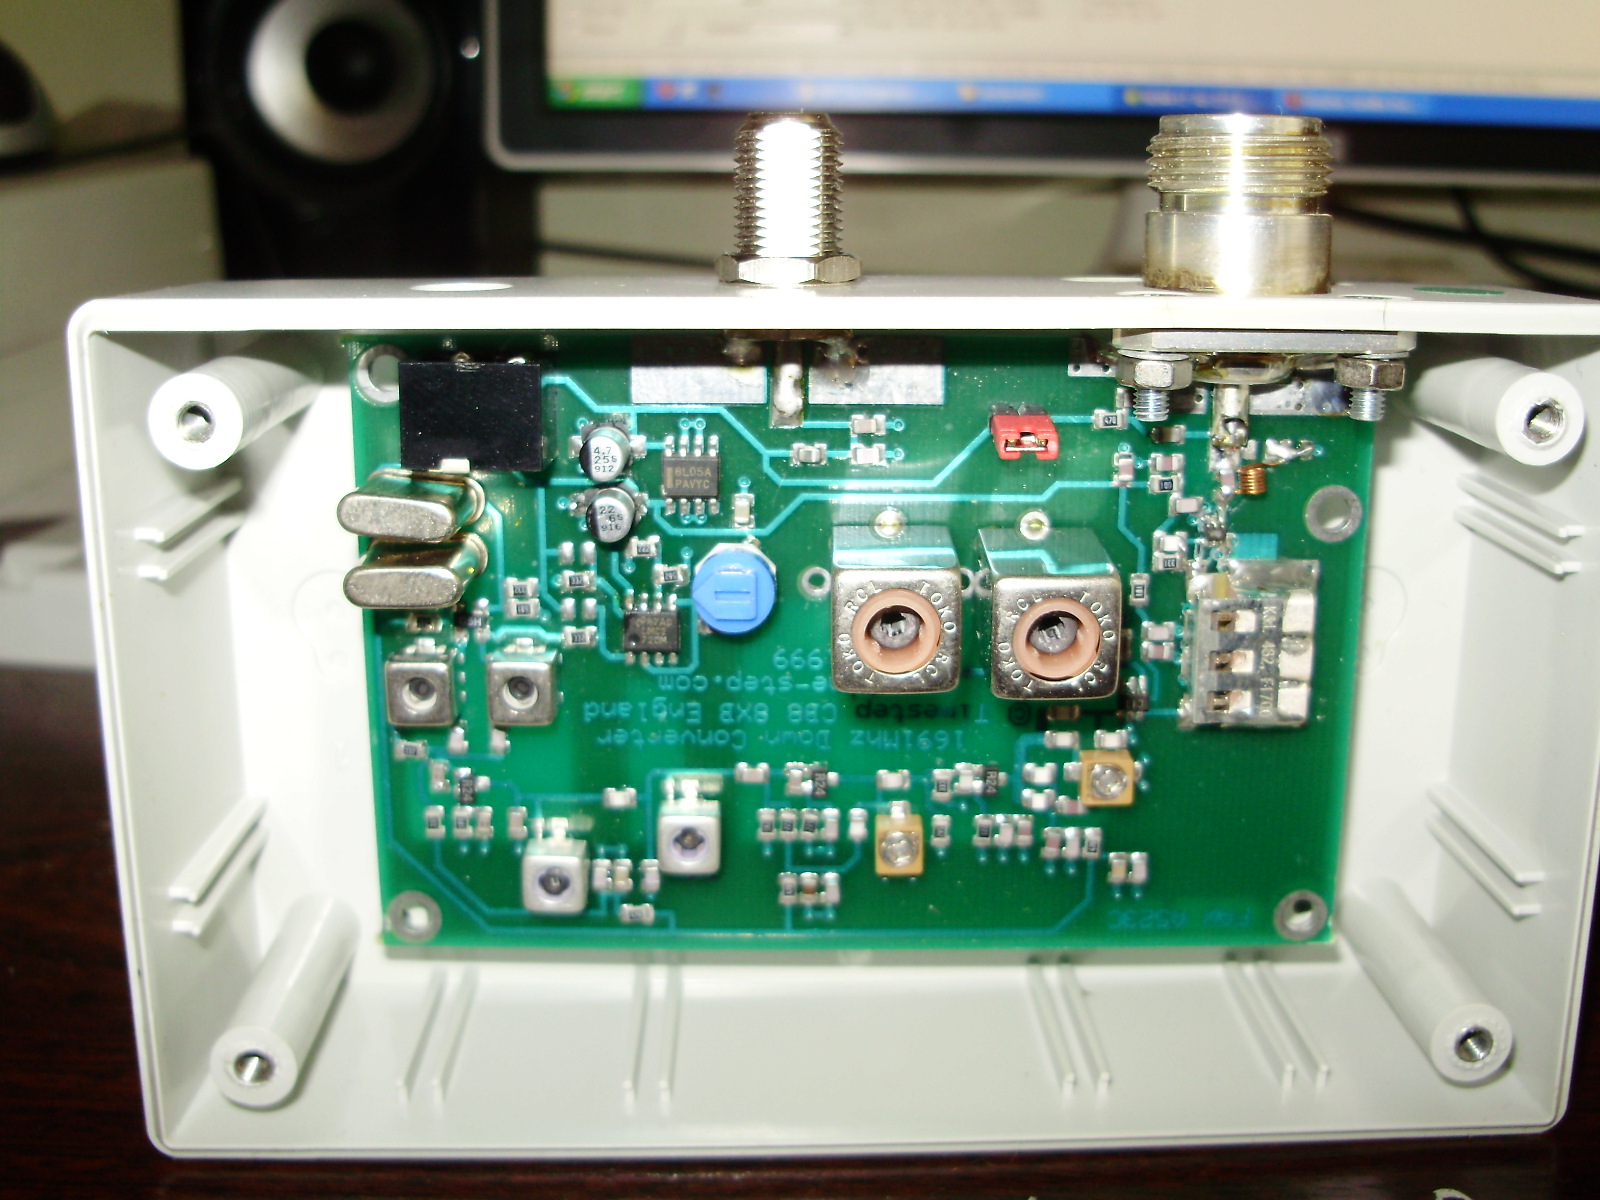
 fig
6
fig
6  fig 7
fig 7
Remember the days of WEFAX? Remember that old downconverter you had that became obsolete? (figs 6&7)Well, itís not any more. You can give it a new lease of life as part of your HRPT system. Used in conjunction with the NE receiver it can cover ALL the HRPT frequencies! Thatís going to save you a lot of money. How can it do the job I here you ask? Well, let me explain. The downconverter is broadband so it will cover from 1690-1710 MHz and the NE receiver covers from 135-155MHz and thatís how itís done! All the frequencies youíll ever need.
The most common and suitable antenna it seems for HRPT is a prime focus dish antenna. You donít want anything too heavy for fear of overloading the rotator but yet you need something large enough to capture the signal. I decided to try and find something midway and settled on a 1.5 m prime focus dish made from Aluminium to reduce the weight and stop rust, although offset dishes have been used for such purposes, see: http://members.inode.at/576265/index.html which is the homepage of Gerald Ihninger of which I find very informative (well done Gerald) I know there are many mesh dishes about but I read that they are not as efficient as solid, I canít confirm this as I havenít done any tests, maybe thatís a chance for some GEO member to study and write about the results to enlighten us all.
The Dish feed of course must match the HRPT receiving frequency of around 1.7GHz. The signal sent is circular polarized so we need an antenna to receive such signals, which usually involves a helical feed. This again can be home made. Again, Gerald Ihninger has an excellent site with antenna feed specifications. I am not yet experienced enough yet in this subject but by reading this article along with the web pages of Rob Alblas and Gerald Ihninger you will have a pretty good idea of what is involved. I myself can only relate my own experiences.
Believe it or not but this is the most expensive part of the set-up, if purchased new anyway. You can of course build your own and save money but I felt this was a bit out of my league so to speak. It seems to me that the most common antenna controller/rotator is the Yaesu 5500 which retails about £450-£500 GBP although I have had no experience whatsoever in using one. At the moment my antenna is still turned by hand! Remember, you need a an Az/El rotator for azimuth and elevation i.e. left and right as well as up and down in order to track the moving Polar satellite. (The antenna must always be pointing at the satellite) There is a way round this expensive problem. I was recently in communication with Ed Murashie from the USA and he has found a perfect solution at a lot less cost. Instead of using the Ham Radio rotator why not use a cctv one? And so it was. I decided to follow Edís advice and settle on the Pelco brand, which is very much cheaper (starting around £100 second-hand) and also much quieter. Ed wrote an article on this for GEO so I wonít cover it here.
Iím still in the process of setting up my HRPT station but due to ill health and rather than wait until all this info is out of date I thought I would send it in now. Itís not nearly as informative as I wanted it to be but I hope to follow up this article with the results of my final installation once I obtain all the equipment so watch out for this in a future edition of the GEO quarterly.
So, to sum up, if you were to ask me the way to go, I would definitely recommend asking in the GEO group for second-hand equipment, and donít be afraid of having a go at making some of it yourself, there are always people around willing to help. Of course if you have the money there are new commercial systems available but at a cost. Iím afraid that path is out for me!
Thanks to Rob Alblas for the donation of ICís and postage, and his help, inspiration, expertise and getting me started in this, To Far Circuits USA for the donated PCB board, Tim Holdsworth for the Amp, Brian Sherriff for the HRPT receiver, down-converter, and donated amp with decoder board. JRW Electronics UK for supplying the components via Farnell Electronics UK and their own source, and anyone else I forgot.
Figs1&2 Courtesy David J Taylor
Fig4 Courtesy Rob Alblas